
Google Webmaster Tools - Verify Google Web Pages Site

In the Google Webmaster Tools you have two options to verify your website. Option 1 is to upload a HTML file and Option 2 is to add a meta tag.

If you have created your site using Google web pages, then you can verify your site using option1.

For this create a new file using Notepad (it could be an empty file) and save it as the name display in Google Webmaster Tools Verify Site page. In my case the name was google7b4f95ee56244085.html.

image

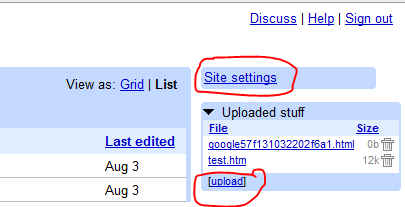
Once you have the file created, open your web site (Google web pages) that you want to verify. In the top right corner you will see Uploaded Stuff and an Upload link. Click at "upload". This will show an upload button to upload this newly created file.

image

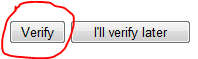
After you upload the file you can go back to Google Webmaster Tools website and click verify.

image

Please let me know if you face any issue I will respond to comment promptly.

Comments

Popular posts from this blog

SharePoint WebPart Error - Unable to add selected web part (s) – MOSS 2007

ISSUE: Recently I faced this issue that when I try to deploy my WebPart.  Unable to add selected web part(s). WebPartName: Cannon unregister UpdatePanel with ID ‘ctl00RTMPanel’ since it was not registerd with the ScripManager. This might occure if the UpdatePanel was removed from the control tree and later added again, which is not supported. Parameter name: updatePanel.   I faced this issue twice and both the time the issue was not what display here. This could be sure to any error in the WebPart. Following are list resolution from multiple instances.   RESOLUTION: 1. Check the WebPartName.webpart file. Check whether you have a proper PublicKeyToken value. When I face the issue the value was PublicKeyToken=$PublicKeyToken$. If you have used WSP builder then in the Visual Studio you will find this file at \WebPartsProject\12\TEMPLATE\FEATURES\WebPartName\WebPartName.webpart. Sometime when you create a new WebPart using WSP builder then you do not get

Could not open virtual machine – vmx is not a valid virtual machine configuration file

I recently faced an issue with one of my VMWare virtual machine that when I try to run this virtual machine it did not work. VMWare display this message that “Could not open virtual machine: .vmx. ".vmx" is not a valid virtual machine configuration file.” ISSUE: Could not open virtual machine: G:\VPC\RakhiQAXPProfQtp\Windows XP Professional.vmx. "G:\VPC\RakhiQAXPProfQtp\Windows XP Professional.vmx" is not a valid virtual machine configuration file. I try to open .vmx file [G:\VPC\RakhiQAXPProfQtp\Windows XP Professional.vmx] in notepad then I found it was empty (0 KB). Resolution: I wanted to resolve it quickly so I try following method and it worked very well. But this is not a valid documented process so please try with caution. Following are the steps 1. First of all go to the folder where you have your virtual machine and delete all .lck folders. 564df2d4-03de-04e8-d1c3-bd2d53dcb1b7.vmem.lck Windows XP Professional.vmdk.lck

How To Create Virtual Machine Using Existing vmdk file in VMWare Workstation

vmdk file is hard disk of the VMWare virtual machine. There are many scenarios where you may need to create a new virtual machine for an existing vmdk file. This is also an alternate Method to the “ vmx is not a valid virtual machine configuration file – Could not open virtual machine ” issue. Please refer to the previous post “ Could not open virtual machine – vmx is not a valid virtual machine configuration file ” for a full list of possible resolution. This post is to describe one of the solution in more details. How To Create a new virtual machine & attach the existing .vmdk file: 1. Open VMware and select create a new virtual machine with custom (advanced) configuration option. 2. Chose “I will install the operating system later”. and chose “I will install the operating system later”. 3. Select the operating system that matches the operating system in your existing .vldk file. 4. Select a location of the new virtual machine 5. Chose “Use an exis